kubectl is the essential command-line tool for managing Kubernetes clusters. It allows you to manage pods, deployments, and other resources from the terminal, helping you troubleshoot Kubernetes issues, check pod health, and scale applications easily. Most kubectl commands follow a simple structure.
For example, kubectl get pods lists running pods, and kubectl delete pod <pod-name> removes a pod.
Many users wonder how to restart a Kubernetes pod using kubectl. Contrary to popular belief, there is no direct kubectl restart pod command. Instead, Kubernetes expects you to work with higher-level objects, such as Deployments.
This guide covers the safest and most effective methods for restarting pods, including rollout restarts, deleting pods, scaling replicas, and updating environment variables, helping you maintain a healthy and stable cluster without guesswork.
When Should You Restart a Kubernetes Pod?
Knowing when to restart a Kubernetes pod is key to maintaining application stability and performance. Here are the most common scenarios that require a pod restart:
1. Configuration Changes
When you update your application’s settings (such as environment variables or resource limits), the pod continues to use the old configurations. Restarting ensures the new settings take effect.
2. Recover from Application Failure
If your app crashes but the container stays in a “Running” state, or the pod shows as running but isn’t functioning, a restart forces a clean start to recover the service.
🐳For more in-depth analysis of pod failures, check out our guide on Exit Code 137 in Kubernetes: Causes, Diagnosis, and Fixes.
3. Debugging Application Issues
Restarting the pod helps resolve temporary issues or confirms persistent problems while troubleshooting why the application isn’t behaving as expected.
Effective debugging often starts with understanding application logs. Learn how to tail kubectl logs in real-time.
4. Pod Stuck or Not Responding
A pod may stop responding to traffic while Kubernetes still reports it as healthy. Restarting resolves frozen states or resource leaks and restores responsiveness.
What are the Different Pod States in Kubernetes?
Understanding the different Kubernetes pod states enables you to monitor your application’s health and take the necessary actions when needed. Here are the key pod states you should know:
1. Pending
Kubernetes has approved the pod, but it is awaiting scheduling and launch. This occurs while Kubernetes is downloading container images or while it is still looking for a suitable node to run your pod. A prolonged pending pod typically indicates a configuration issue or insufficient resources.
2. Running
Your pod has at least one active container. The containers are working, but this doesn’t mean everything is functional. Your application may still have troubles despite the pod running.
3. Succeeded
You typically see this state with jobs or one-time tasks that are designed to run once and finish. It means all containers in the pod have completed their tasks successfully and won’t restart.
4. Failed
The failed state means one or more containers in the pod have stopped running, maybe due to an error, or the system terminated the containers. It indicates something went wrong with your application, or the container couldn’t restart correctly. Failed pods often need a restart.
Instead of reacting to a failing pod, ⚠️ learn how to get ahead of the problem. Our guide on how to catch deployment issues can help you prevent many of these problems before they ever happen.
5. Unknown
This indicates that the node where your pod should be running has lost contact with Kubernetes. Node failures, network problems, or other infrastructure issues may be the cause of this. It’s actually hard to tell what’s going on with your pod when you see this state.
How to Restart Pods in Kubernetes using kubectl
When you search for how to restart a Kubernetes pod using kubectl, the first thing that comes to mind is the command:
However, that command does not exist. Instead, there are several reliable methods to restart Kubernetes pods using kubectl. Below are the most effective and commonly used approaches:
1. Restart Pods Using Kubectl Rollout Restart
This is the safest and most recommended method for restarting pods managed by a deployment. It performs a controlled restart without downtime by creating new pods and removing old ones.
For a deeper dive into managing application lifecycles and automated updates, check out our article on Kubernetes Operators. 🤖
Commands to use:
This command replaces existing pods with new ones. It will remove the old pods after starting and waiting for the new ones. This approach keeps your app up during the restart.
To restart pods in a deployment within a specific namespace:
To check the status of your restart
Consider this strategy if you want minimal downtime, the safest alternative, or have deployment-managed pods.
2. Delete Individual Pods to Force Restart
With this method, you must delete pods to force Kubernetes to recreate them. It’s simpler than rollout restart, but you must watch which pods you remove.
If the pod is managed by a deployment, replica set, or equivalent controller, Kubernetes immediately creates a new one when you delete the existing one. However, this may temporarily disrupt service.
Here’s how to go about it:
# List all pods to see what you're working with
kubectl get pods

# To delete a specific pod
kubectl delete pod <pod-name>

# To delete multiple pods at once
kubectl delete pod <pod-1> <pod-2>

# To delete and wait to remove fully
kubectl delete pod <pod-name> --wait=true

# To force delete a stuck pod (use with caution)
kubectl delete pod <pod-name> --grace-period=0 --force
Delete only controller-managed pods. A standalone pod that isn’t managed by anything will never be restored if it is deleted.
3. Scale Deployment Replicas to Restart Pods
This strategy works by scaling your deployment down to zero replicas for a short time, which stops all the pods. Then it scales back up to the number you started with. Kubernetes lets you turn your program off and back again in a controlled way.
1. Check how many replicas you currently have
2. Scale down to zero
3. Lastly, scale back up to your original number (creates new pods)
When you scale down to zero, Kubernetes deletes all the pods in that deployment. When you scale back up, it creates new pods from scratch. This approach is more aggressive than rollout restart, but sometimes necessary when you need a complete fresh start.
4. Update Environment Variables to Trigger a Restart
This is yet another clever method for pod restarts. You will need to modify their configuration slightly. Kubernetes interprets changing environment variables in a deployment as a configuration change and restarts the pods automatically to implement the updated configuration.
The key here is that you don’t even have to alter your environment variables significantly. To initiate the restart, update a timestamp or add a dummy variable.
For instance:
You can update an existing environment variable
or
You can also edit the deployment directly:
Then add or modify any environment variable in the editor.
The benefit of using this approach is that it follows the same safe strategy as the rollout restart, and there’s no downtime during the restart process.
5. Replacing Pods Manually
Using the same configuration or an updated version, this method requires deleting particular pods and then manually creating new ones to replace them. You have total control over the creation and deletion processes with this method.
1. Get the pod configuration and save it
2. Delete the existing pod
3. Create a new pod using the saved configuration
This method causes downtime because the old pod is removed before the new one starts. This method is only used with standalone pods; don’t do this with pods managed by deployments.
Monitoring Pods with Middleware
Monitoring Kubernetes pods keeps apps healthy. Without monitoring, you may overlook memory leaks, high CPU consumption, or network difficulties that could kill pods. The best way to know when and how to perform a kubectl restart pod is with continuous monitoring.
Our guide to Kubernetes Monitoring Tools can help you choose the right solution for your needs.
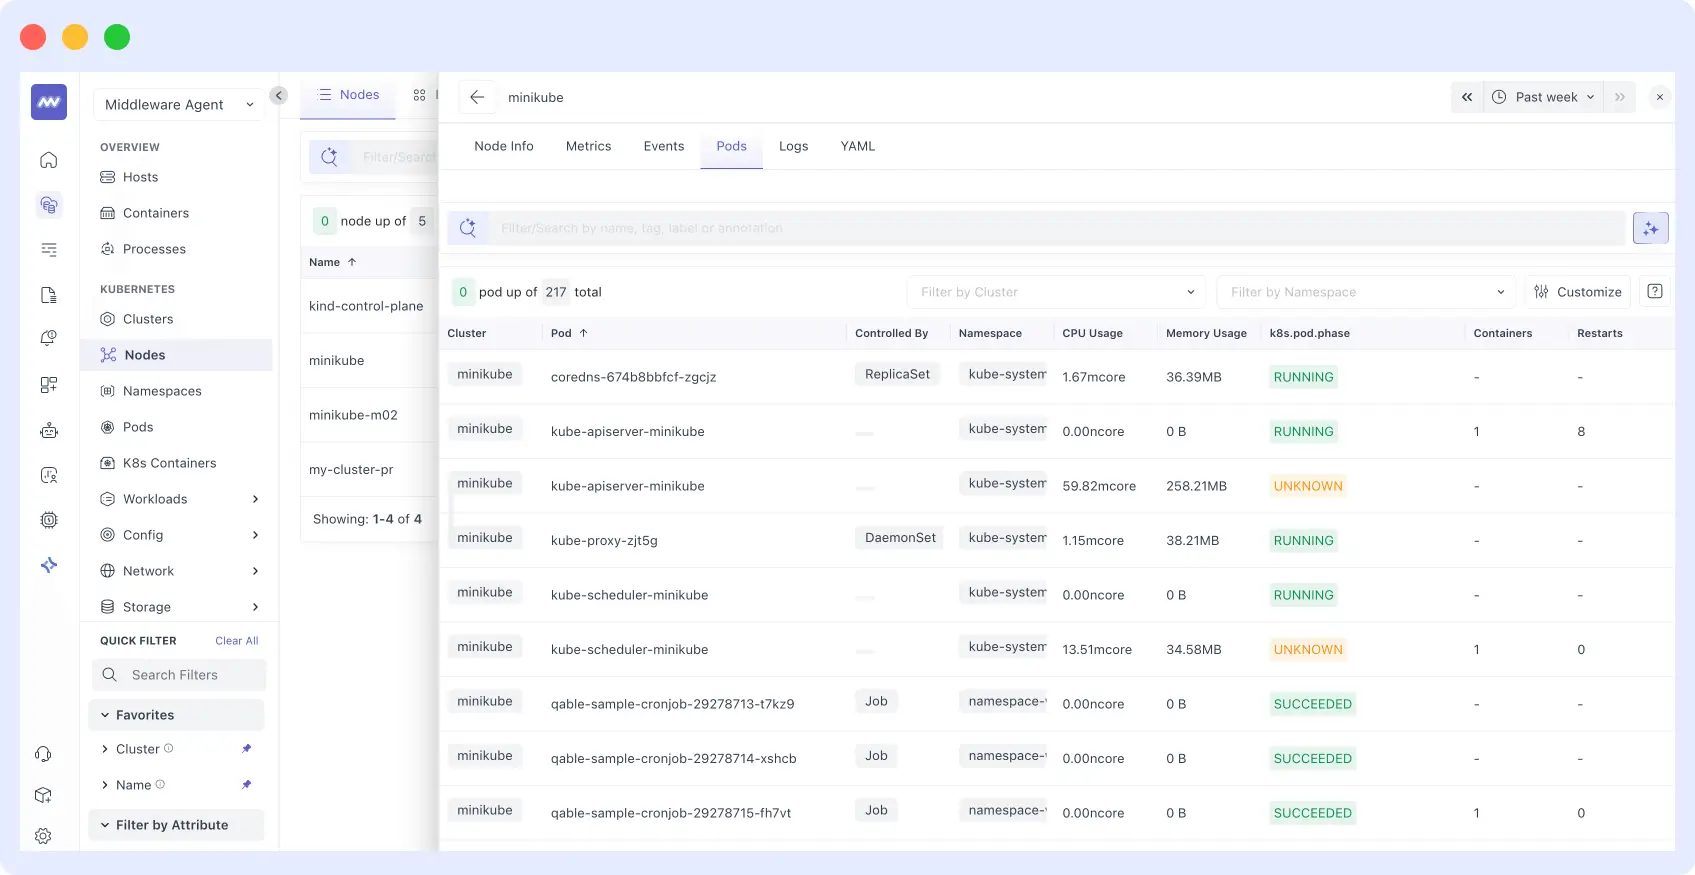
Middleware provides a simple and user-friendly platform that allows you to monitor pod metrics. Once you install and set up Middleware in your cluster, you’ll be able to track pods like:
- CPU and memory usage
- Pod restart counts and reasons
- Network traffic and errors
- Container health status
- Resource limits and requests
Middleware helps you make decisions by displaying the issue rather than relying on your intuition about when to restart pods. You will be able to see whether a pod is throwing errors, not responding to requests, or using excessive amounts of memory.
How to Set Up Middleware for Kubernetes Pod Monitoring
The installation involves setting up Middleware Agent inside your Kubernetes cluster to collect data and display it on a centralized dashboard for you to see and analyze. This setup process is simplified in the official documentation, so you can check it out.
Proper monitoring is a cornerstone of Kubernetes Observability, which encompasses more than just metrics; it also includes logs and traces.
Getting started with Middleware is straightforward, and in this guide, I’m going to simplify it into two simple steps:
Step 1. Install the Middleware Agent
This can be done in three different ways. You can install the Middleware Agent using either helm, bash, or.bat.
- Install Via Helm:
helm repo add middleware-labs https://helm.middleware.io

helm install mw-agent middleware-labs/mw-kube-agent-v3 --set mw.apiKey=<MW_API_KEY> --set mw.target=https://<MW_UID>.middleware.io:443 --set clusterMetadata.name=<your-cluster-name> -n mw-agent-ns --create-namespace
2. Install via Bash
MW_API_KEY="" MW_TARGET=https://.middleware.io:443 bash -c "$(curl -L https://install.middleware.io/scripts/mw-kube-agent-install-v3.sh)"3. Install via .bat (Windows)
set MW_API_KEY="<MW_API_KEY>"
set MW_TARGET=https://<MW_UID>.middleware.io:443
Mw-kube-agent-install-windows.bat
Replace <your-cluster-name> and <MW_API_KEY> with the right information. You can get these from your dashboard.
For the cluster name, you’ll have to set it up here:
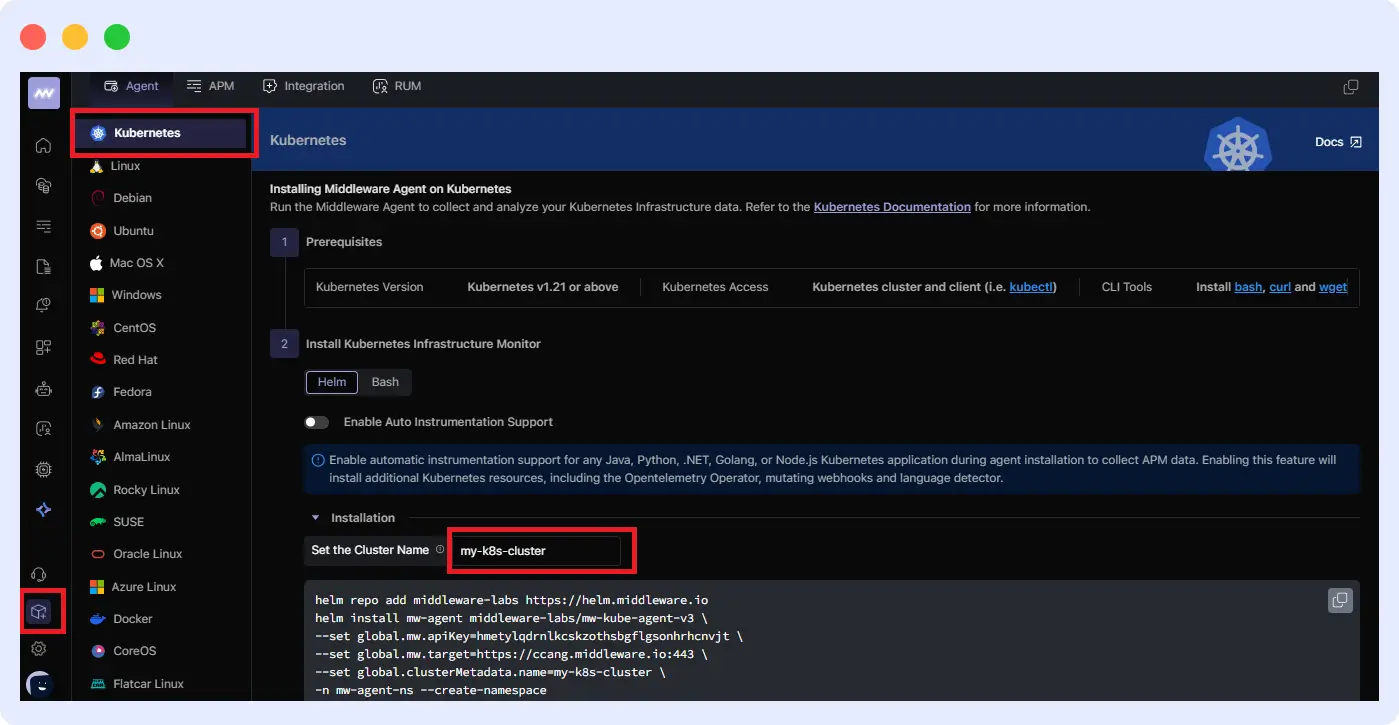
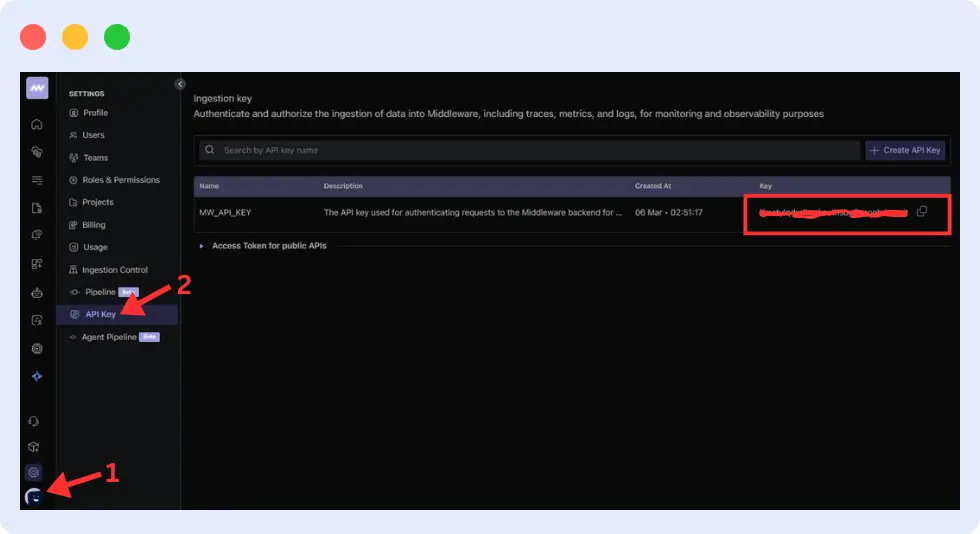
For the API KEY, you can get it from “your profile > API Key”
Next, verify the installation by running the command:
kubectl get daemonset/mw-kube-agent -n mw-agent-ns
kubectl get deployment/mw-kube-agent -n mw-agent-ns
2. Access the dashboard
Once installed, Middleware automatically collects data from your Kubernetes cluster and presents it in an easy-to-use dashboard. From there, you can:
- Monitor CPU and memory usage per pod
- Track pod restart counts and reasons
- View network traffic and error rates
- Analyze container health and resource limits
Tracking pod restarts is crucial for understanding application health. For a more detailed look at the
kubectl logs tailcommand and what to look for, see our guide on Kubernetes Logging.
Additionally, set up custom alerts to get instant notifications when a pod becomes unhealthy or consumes excessive resources, helping you act before issues impact your applications.
Conclusion
To wrap it up, restarting Kubernetes pods can help you in so many ways, as discussed in this article, one of which is maintaining healthy applications. It doesn’t matter the method you choose to use; the key thing is to understand when and why you want to restart.
Monitoring pods also helps you in making the right restart decision. Instead of guessing what’s wrong, which you might be wrong about, proper observability shows you exactly when pods need attention.
Start monitoring your pods with Middleware and catch issues before they become problems.
FAQs
How can I restart a single pod?
Use kubectl delete pod <pod-name> to remove the pod. If it is a component of a deployment, Kubernetes will automatically generate a new one.
Which Method of Testing Pods in a Deployment is the Safest?
Restart the deployment of my-app using kubectl rollout. This eliminates downtime by restarting pods one at a time.
What happens if I delete a Pod?
If it is managed by a deployment, Kubernetes creates a new pod, but if it’s standalone, it’ll be gone forever.
When should I avoid restarting Pods manually?
Don’t restart during high traffic, in production without monitoring, or when you haven’t fixed the root cause of the problem first.